Seamless Connectivity: Wavlink Powerline Setup Guide
Welcome to effortless internet connectivity with the Wavlink Powerline Setup adapters. In this comprehensive guide, we’ll walk you through the setup process step by step, ensuring you can establish a reliable wired network connection throughout your home or office. Let’s dive in.
Unboxing and Initial Wavlink Powerline Setup
Start by unboxing your Wavlink Powerline adapters. Inside the package, you’ll typically find:
- Two Powerline adapters
- Two Ethernet cables
- Quick installation guide
To begin the setup process, follow these simple steps:
- Connect one of the Powerline adapters to a power outlet near your router using the provided Ethernet cable.
- Connect the other Powerline adapter to a power outlet in the area where you need internet access, using the second Ethernet cable to connect it to your device (such as a computer or smart TV).
- Wait for the Powerline adapters to power on, indicated by LED lights on each device.
Pairing the Powerline Adapters
Once the Powerline adapters are powered on, they need to be paired to establish a secure connection. Here’s how:
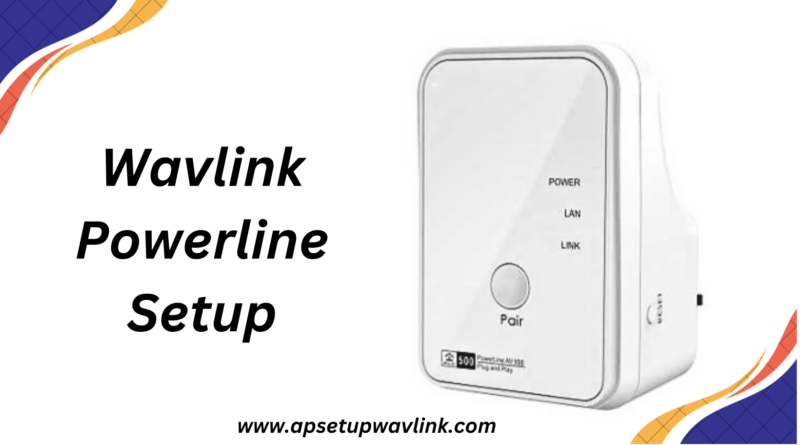
- Press the Pair/Encryption button on one of the Powerline adapters for about 1-2 seconds.
- Within two minutes, press the Pair/Encryption button on the second Powerline adapter for 1-2 seconds.
- The LED lights on both adapters should indicate a successful pairing, typically by flashing or turning a solid color.
Testing the Connection
With the Powerline adapters paired, it’s time to test the connection to ensure everything is working correctly:
- Check the LED lights on both adapters to confirm they are connected and functioning properly.
- On your device connected to the second Powerline adapter, check for internet connectivity and ensure it’s working as expected.
Resetting the Wavlink Powerline Adapter
- Locate the reset button on your Wavlink Powerline adapter. It’s usually a small button that may be recessed to prevent accidental presses.
- Use a paperclip or a similar tool to press and hold the reset button for about 10-15 seconds.
- Release the reset button when the status lights on the adapter start blinking or change patterns. This indicates that the reset process has begun.
- Wait for a few moments until the adapter fully resets. The lights may stabilize or turn off and then back on.
Updating the Firmware
- Open a web browser on a computer or mobile device connected to the same network as your Wavlink Powerline adapter.
- Enter the IP address of the adapter into the address bar of the web browser. The default IP address is often printed on the adapter or provided in the user manual. It typically looks like “192.168.x.x”.
- You’ll be prompted to enter a username and password. The default credentials are usually “admin” for both the username and password, but they might differ depending on your model. Check the user manual if you’re unsure.
- Once logged in, navigate to the firmware update section. This can typically be found in the settings or administration tab of the interface.
- Download the latest firmware update file from the manufacturer’s website onto your computer.
- In the firmware update section of the interface, locate the option to upload or choose the firmware file.
- Select the firmware file you downloaded and follow the on-screen instructions to initiate the update process.
- The update process may take several minutes. Do not power off the adapter or interrupt the process during this time.
- Once the update is complete, the adapter may reboot automatically. If not, you may need to power cycle it manually.
That’s it! Your Wavlink Powerline adapter should now be reset and running the latest firmware version. If you encounter any issues during the process, refer to the user manual or reach out to Wavlink customer support for assistance.
Troubleshooting and Optimization: Wavlink Powerline Setup
If you encounter any issues during setup or experience slow internet speeds, here are some troubleshooting tips:
- Ensure both Powerline adapters are plugged directly into a wall outlet, avoiding power strips or surge protectors.
- Try different power outlets in case of electrical interference.
- Avoid placing the adapters near large appliances or devices that may cause electromagnetic interference.
- Update the firmware of the Powerline adapters to the latest version, if available, to ensure optimal performance.
Conclusion: Wavlink Powerline Setup
Congratulations! You’ve successfully done Wavlink Powerline Setup, establishing a reliable wired network connection throughout your space. By following this guide, you can enjoy seamless internet connectivity without the hassle of running Ethernet cables or dealing with unreliable WiFi signals. Explore additional features and settings to further optimize your Powerline network and enhance your internet experience. Happy browsing!

